


Your retainer is doing something invisible but important: it holds your teeth in position after orthodontic treatment ends. The biology has not finished working when your braces come off or your last aligner tray is worn. Your teeth are still stabilizing in their new positions, and the retainer is what keeps them there. Neglect the retainer, and the treatment you invested in starts to reverse. But cleaning a retainer incorrectly is nearly as bad as not cleaning it at all, and the wrong approach damages the material and shortens the appliance’s useful life.
How to clean your retainer correctly depends on what type you have. This guide covers both removable (Hawley and clear plastic) and bonded (fixed) retainers.

Why Cleaning Matters More Than Most Patients Realize
A retainer lives in the warmest, most bacteria-rich environment in your body: your mouth. The same bacterial activity that causes tooth decay and gum disease accumulates on retainer surfaces within hours of wear. Tartar, the hardened calcium deposit that requires a dental instrument to remove, forms on retainers just as it forms on teeth.
A retainer you neglect for weeks develops a biofilm that harbors Streptococcus mutans (the primary cavity-causing bacteria), Candida albicans (yeast that causes oral thrush), and other pathogens. Wearing a contaminated retainer puts those organisms back in contact with your teeth and gums every time you put it in.
Beyond the hygiene issue, protein deposits from saliva and food particles cause clear plastic retainers to cloud and develop odors that no amount of casual rinsing removes.
The practical takeaway: cleaning your retainer consistently is not optional maintenance. It directly affects both the health of your mouth and the longevity of the appliance.
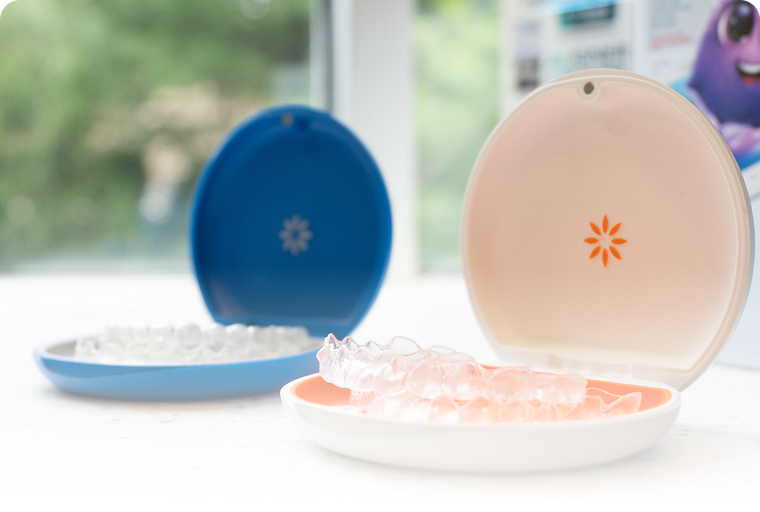
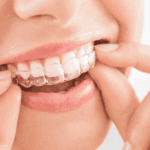
Removable Retainers: Hawley vs. Clear Plastic
The cleaning approach differs between the two main types of removable retainers:
Hawley retainers use a metal wire component embedded in an acrylic base. The acrylic can be cleaned with gentle soap and a soft brush. The wire component can handle mild cleaning solutions. Hawley retainers are generally more durable than clear plastic retainers and tolerate slightly more vigorous cleaning.
Clear plastic retainers (Essix-style, similar in appearance to Invisalign aligners) require gentler handling. The plastic is more vulnerable to discoloration from heat, to scratching from abrasive cleaning products, and to chemical degradation from alcohol-based products.
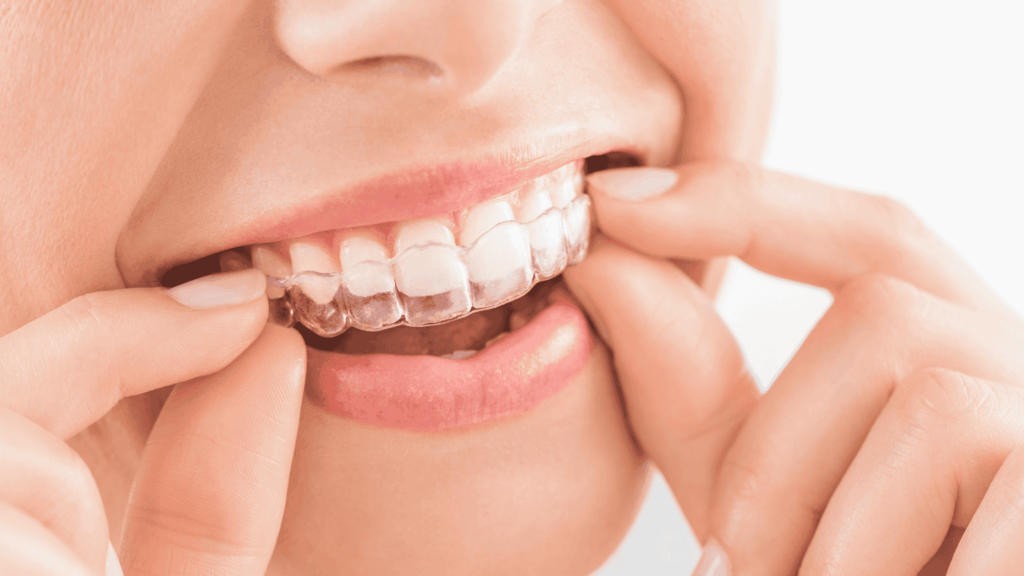
Step-by-Step: Cleaning a Clear Plastic Retainer
Did you know? This is the most commonly needed cleaning protocol—and the one most patients get wrong! Keep your smile bright and your retainer crystal clear by following this easy guide.
💧 STEP 1: Remove & Rinse Immediately
The moment you take it out, get it to the sink!
✅ DO: Rinse under cool running water.
🚫 DON’T: Use warm or hot water. Heat above 40°C (104°F) will permanently warp the clear plastic!
🪥 STEP 2: Brush Gently
Be kind to the plastic to keep it invisible.
✅ DO: Use a soft-bristled brush (a dedicated retainer brush, not your daily toothbrush) and a small drop of mild dish soap (like unscented Dawn). Brush all internal and external surfaces.
🚫 DON’T: Use toothpaste! Standard toothpaste contains abrasive silica particles that will scratch the plastic, creating a cloudy, dingy surface that traps bacteria.
🚿 STEP 3: Rinse Thoroughly
Wash away the suds.
✅ DO: Rinse off all soap residue completely under cool running water.
🫧 STEP 4: Soak for a Deep Clean
Target calcium deposits and invisible buildup.
✅ DO (Option A): Soak in a diluted solution of 1 part white vinegar to 3 parts cool water for 15–20 minutes, then rinse well.
✅ DO (Option B): Use denture cleaning tablets (like Efferdent or Polident) diluted in water according to the package directions.
🚫 DON’T: Soak in mouthwashes containing alcohol. It will damage the plastic and discolor your retainer over time.
🌬️ STEP 5: Dry Before Storing
Keep it fresh and fungus-free.
✅ DO: Allow it to air dry for a few minutes, or gently pat it dry with a clean paper towel before putting it away.
🚫 DON’T: Snap a wet retainer into a closed case. Trapped moisture is the perfect breeding ground for bacteria and fungal growth!
How Often to Clean
Every time you remove it: Rinse under cool water immediately.
At least once per day: Full brush-and-soap cleaning, ideally when you are brushing your teeth.
Weekly: A deeper soak as described above.
This schedule prevents the accumulation that turns a mild cleaning task into a difficult remediation project.

What NOT to Do (Common Mistakes)
Do not clean with toothpaste. The abrasive agents in toothpaste damage clear plastic surfaces. This is one of the most common mistakes orthodontic patients make.
Do not use alcohol-based products. Alcohol-containing mouthwashes (Listerine, Scope) and isopropyl alcohol both damage clear plastic and can cause discoloration.
Do not expose to heat. Dishwashers, microwaves, and leaving the retainer in a hot car will warp the appliance. A warped retainer no longer fits correctly and cannot be repaired.
Do not soak for extended periods in bleach solutions. Diluted bleach (1 teaspoon per cup of water) is occasionally referenced as a cleaning option, but it should only be used briefly and for severe contamination. Extended exposure bleaches the acrylic components and can damage wire elements.
Do not skip drying before storage. Wet retainers stored in closed cases create the ideal conditions for mold growth.
Cleaning Fixed (Bonded) Retainers
A bonded retainer is a thin wire fixed to the backs of your teeth by your orthodontist. You cannot remove it, and it requires different maintenance than a removable appliance.
Daily flossing is non-negotiable. Food and plaque accumulate around the wire and at the bond points. Use a floss threader or orthodontic floss to clean under and around the wire daily. Superfloss (orthodontic floss with a stiff threader end and a spongy middle section) makes this more efficient.
Interproximal brushes (Proxabrush or similar): These small bottle-brush style implements clean between teeth where floss cannot reach easily, particularly around bonded retainer wires. Use them between each bonded tooth.
Professional cleaning: Bonded retainers accumulate calculus (tartar) at the wire contact points faster than most surfaces in the mouth. Your dentist or dental hygienist needs to clean these deposits during your regular 6-month preventive appointments, ideally more frequently if you are prone to buildup.
When to Replace or Have Your Retainer Adjusted
A clear plastic retainer that fits correctly but shows significant cloudiness, odor despite thorough cleaning, or visible cracks or crazing should be replaced. The physical integrity of the appliance matters: a cracked retainer can break in your mouth and, for some fracture types, presents an aspiration risk.
Bonded retainers that become loose at one or more bond points need to be checked by your orthodontist immediately. A partially bonded retainer may move teeth in the wrong direction if only some bond points are intact.
Contact Gladwell Orthodontics if your retainer no longer fits correctly, if it has visibly changed shape, or if you notice any loosening of a bonded retainer. Retainer problems caught early are usually simple to address; problems left unaddressed can require retreatment.
How Long Retainers Last

With proper care, clear plastic retainers typically last 2 to 5 years before they need replacement due to normal wear. Hawley retainers last longer, often 5 to 10 years, because the acrylic base is more robust than the thin plastic of an Essix-style retainer.
Signs that your clear retainer needs replacement:
- Visible cracks, even small hairline fractures at thin points
- Permanent cloudiness that does not respond to cleaning
- Warping that affects the fit
- Persistent odor despite thorough cleaning
Bonded retainers, when properly maintained and periodically serviced by your orthodontist, can remain in place indefinitely. Some patients keep their bonded retainers for 20-plus years without issues. The wire may eventually need replacement due to metal fatigue, but this is a simple procedure compared to starting retainer treatment from scratch.
Building a Retainer Care Routine That Sticks
The patients who have the most success maintaining their orthodontic results over the long term are those who integrate retainer care into an existing habit rather than treating it as a separate task. The practical approaches that work:
Keep your retainer case and cleaning supplies in the same spot as your toothbrush. When you brush, clean the retainer. The tasks share the same location and timing, making the behavior automatic.
Set a phone reminder for the weekly deep soak until it becomes habitual. Sunday evening is a common choice because it is an easy anchor point in the weekly routine.
When traveling, bring your retainer case, your soft brush, and a small bottle of liquid soap. Hotels do not stock the supplies you need, and a week of neglected retainer care shows up in bacterial accumulation and odor that takes several cleaning sessions to clear.
GIVE US A CALL AT 919-923-8513 OR BOOK YOUR NEW PATIENT EXAM NOW
![]()